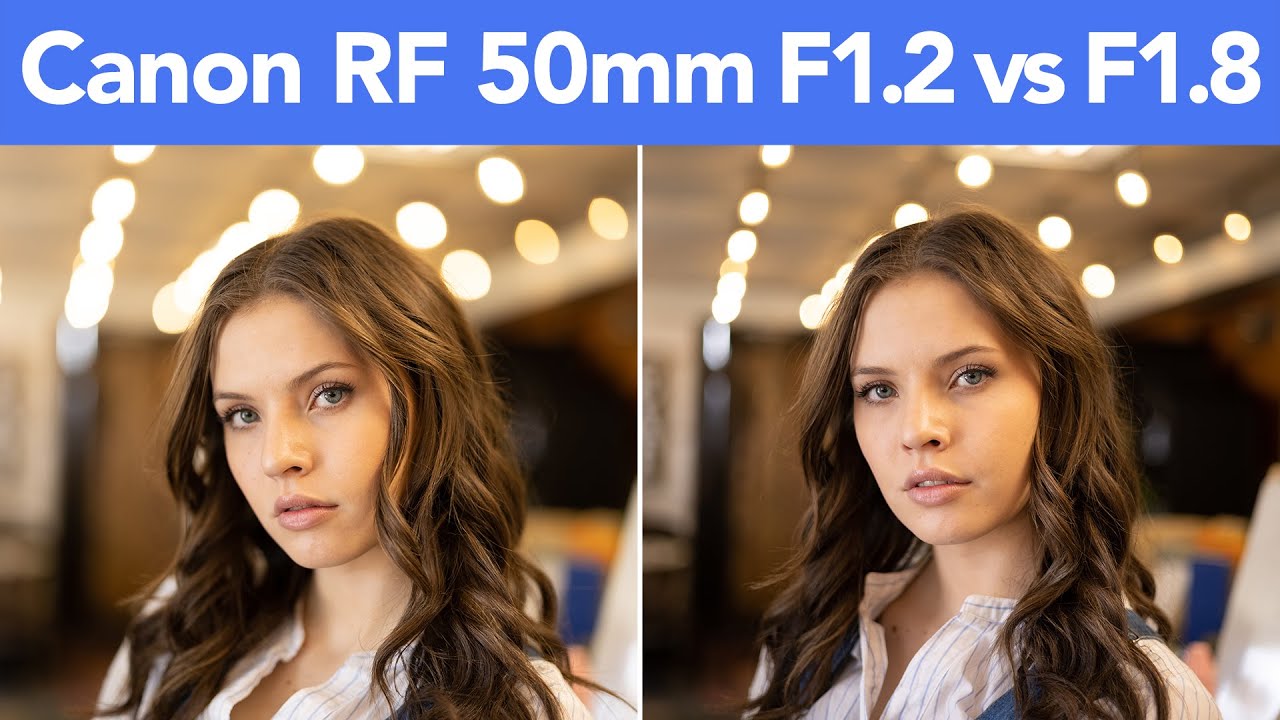
Here’s the question I get more than almost any other: “Do I really need to spend more to get better results?” I’ve built my whole review approach around answering that honestly, without defaulting to “well, more expensive is always better” or the equally useless contrarian take that gear never matters. Most of the time the truth lives somewhere specific and boring in the middle. But occasionally a comparison comes along that actually surprises you.
In this The Slanted Lens tutorial, host JP Morgan puts Canon’s RF 50mm f/1.2 (roughly $2,200) head-to-head against the RF 50mm f/1.8 (around $200) across several real-world tests. Watch the full tutorial on YouTube before or after reading this, because seeing the side-by-side frames drives the point home in a way words only partially can. What he finds is genuinely useful information for anyone trying to decide whether that extra $2,000 is justified or whether it’s the kind of money better spent on a second body, lighting, or a lens in a focal length you’re actually missing.
Step 1: Set Up a Controlled Sharpness Comparison
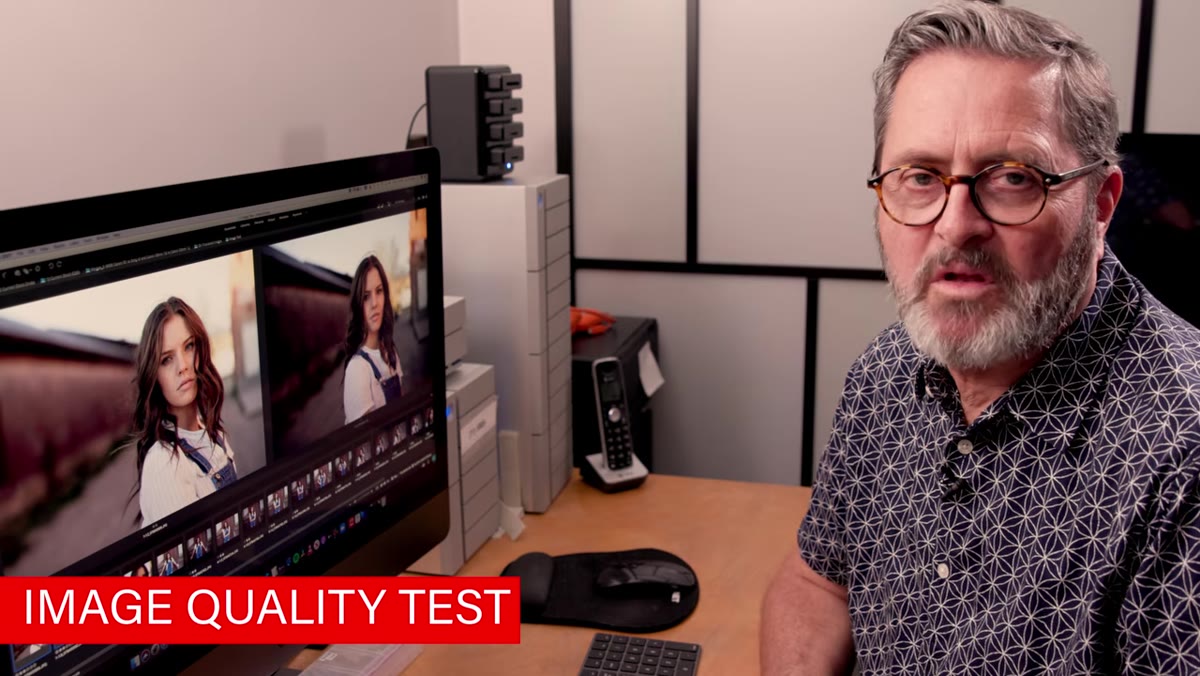 Side-by-side sharpness test images on screen
Before you can draw any conclusions from a lens comparison, you need images shot under the same conditions at the same distance. JP shoots both lenses at their respective wide-open apertures, pointed at the same subject, from the same position. When you pull the images up side by side, the first thing you notice even before pixel-peeping is color rendering. The f/1.2 reads slightly warm and yellowish. The f/1.8 pulls cooler and more reddish, with noticeably more contrast baked in. Neither is “correct,” but it’s worth knowing before you shoot so you’re not chasing a white balance problem in post that’s actually a lens characteristic.
Side-by-side sharpness test images on screen
Before you can draw any conclusions from a lens comparison, you need images shot under the same conditions at the same distance. JP shoots both lenses at their respective wide-open apertures, pointed at the same subject, from the same position. When you pull the images up side by side, the first thing you notice even before pixel-peeping is color rendering. The f/1.2 reads slightly warm and yellowish. The f/1.8 pulls cooler and more reddish, with noticeably more contrast baked in. Neither is “correct,” but it’s worth knowing before you shoot so you’re not chasing a white balance problem in post that’s actually a lens characteristic.
Step 2: Evaluate Center Sharpness at Wide Open
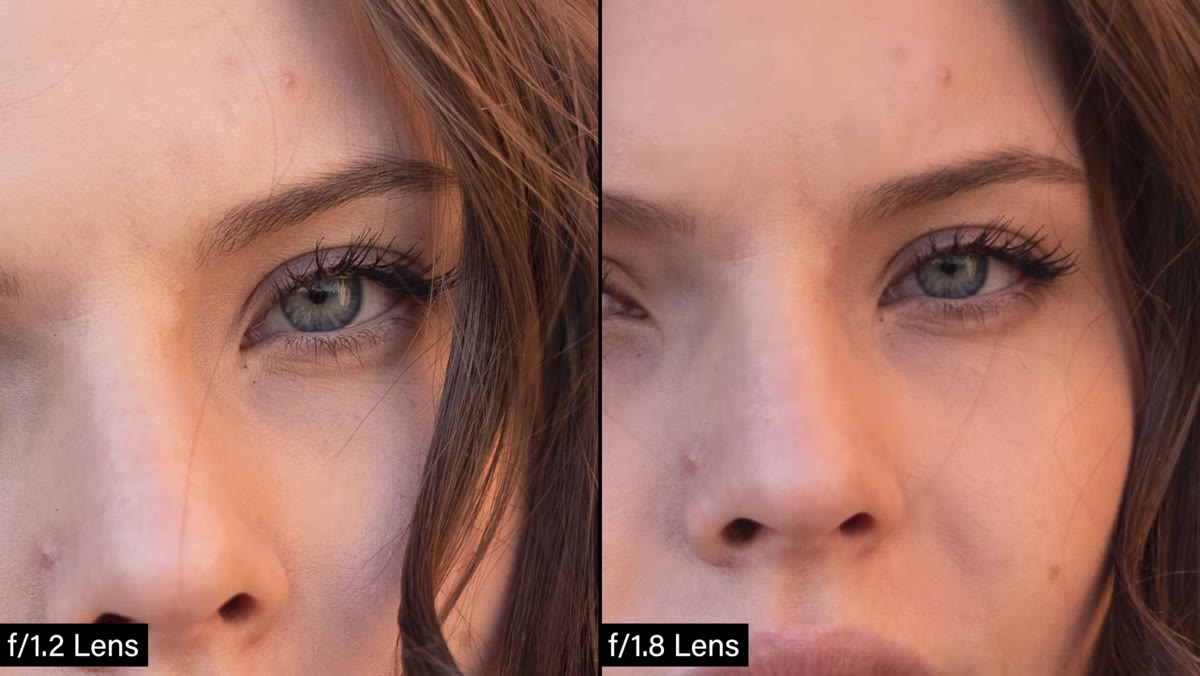 Zoomed-in crop comparing sharpness between both lenses
This is where the price gap starts to feel real. Punching into 100% crops from both lenses, the f/1.2 is legitimately impressive. Fine detail resolves cleanly, without the mushy micro-contrast you sometimes see from fast primes shot wide open. The f/1.8 is sharp too. Let’s be clear about that because it matters for the value argument. It’s not embarrassing. It’s not the kind of soft that ruins a photo. But it tries to compensate for slightly lower optical resolution by cranking up contrast, which gives edges a crunchy, almost over-sharpened quality. If you’re shooting portraits and planning to do any skin retouching, that extra contrast from the f/1.8 actually creates a bit more work in post.
Zoomed-in crop comparing sharpness between both lenses
This is where the price gap starts to feel real. Punching into 100% crops from both lenses, the f/1.2 is legitimately impressive. Fine detail resolves cleanly, without the mushy micro-contrast you sometimes see from fast primes shot wide open. The f/1.8 is sharp too. Let’s be clear about that because it matters for the value argument. It’s not embarrassing. It’s not the kind of soft that ruins a photo. But it tries to compensate for slightly lower optical resolution by cranking up contrast, which gives edges a crunchy, almost over-sharpened quality. If you’re shooting portraits and planning to do any skin retouching, that extra contrast from the f/1.8 actually creates a bit more work in post.
Step 3: Check Edge-to-Edge Consistency and Vignetting
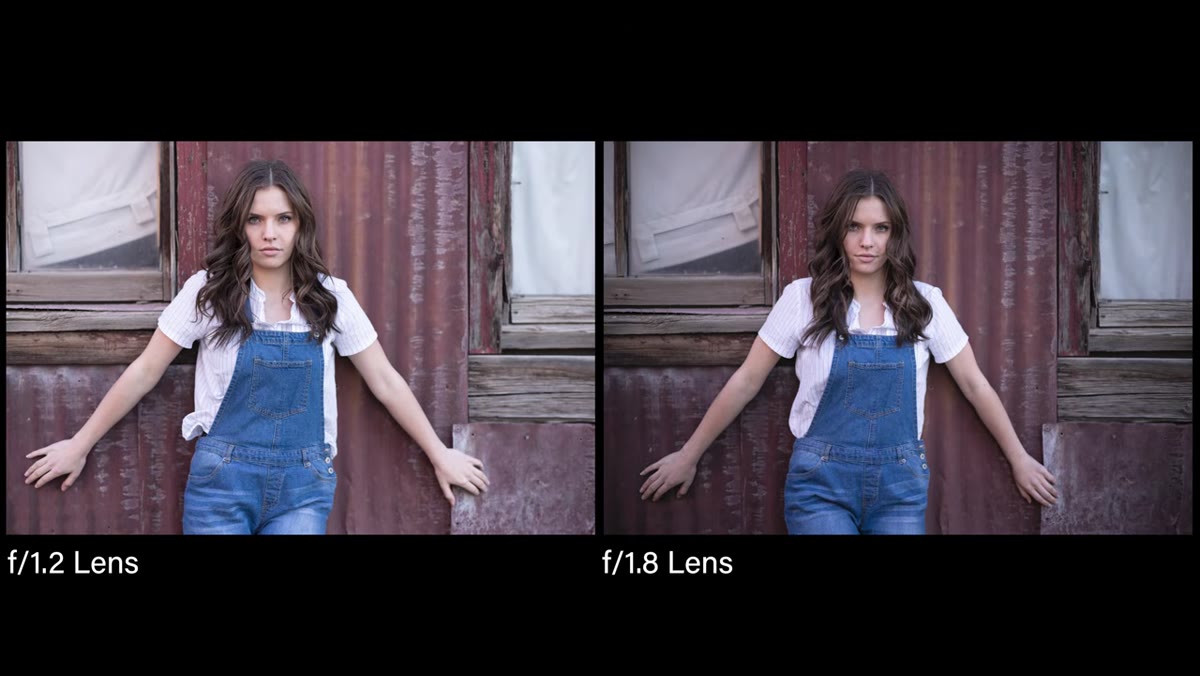 Window frame shot showing vignetting on the f/1.8
JP shoots a window frame to force both lenses to show their full field performance, not just center sharpness. The f/1.2 holds up well across the frame with clean exposure from edge to edge. The f/1.8 shows visible light falloff in the corners at wide open. For environmental portraits or anything where your subject is centered and the background doesn’t matter, you’ll never notice. But if you’re shooting interiors, architecture, or group shots where edge detail counts, the vignetting on the f/1.8 is something you’ll be correcting regularly in Lightroom. It’s fixable, but it’s a consistent extra step.
Window frame shot showing vignetting on the f/1.8
JP shoots a window frame to force both lenses to show their full field performance, not just center sharpness. The f/1.2 holds up well across the frame with clean exposure from edge to edge. The f/1.8 shows visible light falloff in the corners at wide open. For environmental portraits or anything where your subject is centered and the background doesn’t matter, you’ll never notice. But if you’re shooting interiors, architecture, or group shots where edge detail counts, the vignetting on the f/1.8 is something you’ll be correcting regularly in Lightroom. It’s fixable, but it’s a consistent extra step.
Step 4: Test Minimum Focus Distance
 Close-focus comparison showing distance difference between lenses
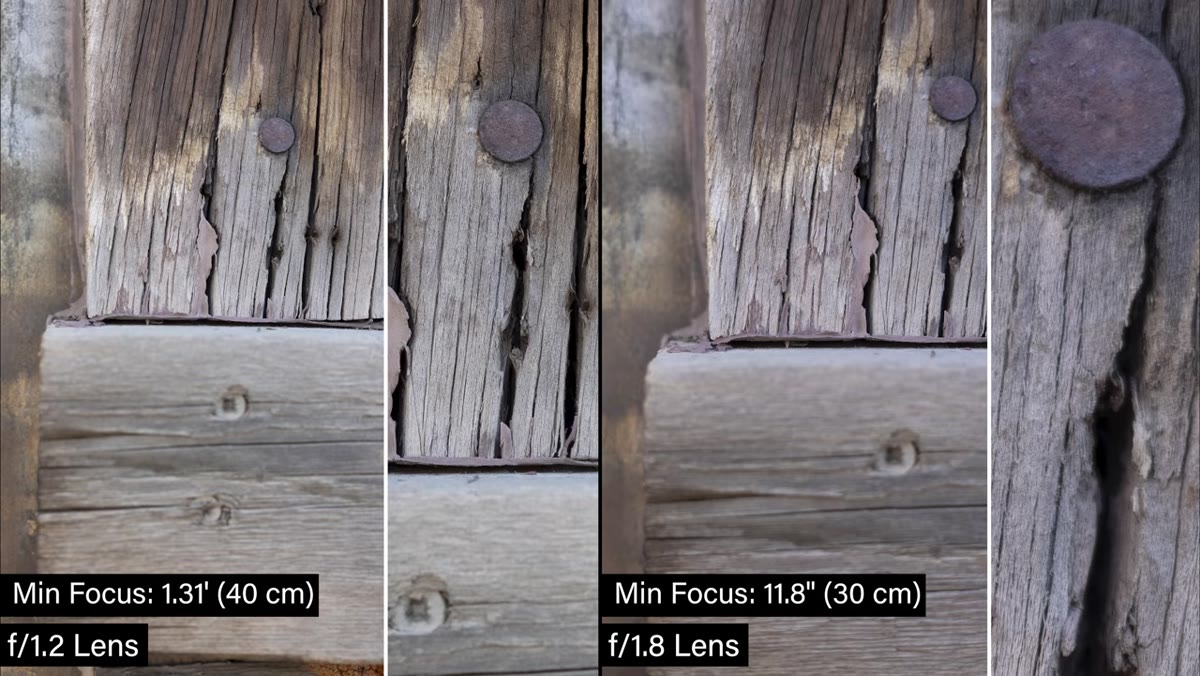
This is the section that genuinely surprised me when I watched it, and it’s probably the most practically useful finding in the whole video. The RF 50mm f/1.8 focuses down to about 11.8 inches. The f/1.2 needs roughly 15 inches of working distance before it locks on. That gap doesn’t sound dramatic until you’re trying to fill the frame with a product, a ring at a wedding, or a flower, and one lens gets you there while the other forces you to step back. JP notes that the f/1.8 is one of the closest-focusing 50mm lenses ever made outside of dedicated macro glass. For product shooters or anyone doing lifestyle work with tight detail shots, this is a genuine functional advantage for the cheaper lens.
Close-focus comparison showing distance difference between lenses
This is the section that genuinely surprised me when I watched it, and it’s probably the most practically useful finding in the whole video. The RF 50mm f/1.8 focuses down to about 11.8 inches. The f/1.2 needs roughly 15 inches of working distance before it locks on. That gap doesn’t sound dramatic until you’re trying to fill the frame with a product, a ring at a wedding, or a flower, and one lens gets you there while the other forces you to step back. JP notes that the f/1.8 is one of the closest-focusing 50mm lenses ever made outside of dedicated macro glass. For product shooters or anyone doing lifestyle work with tight detail shots, this is a genuine functional advantage for the cheaper lens.
Step 5: Compare Bokeh Quality and Size
 Bokeh comparison with background lights, f/1.2 vs f/1.8
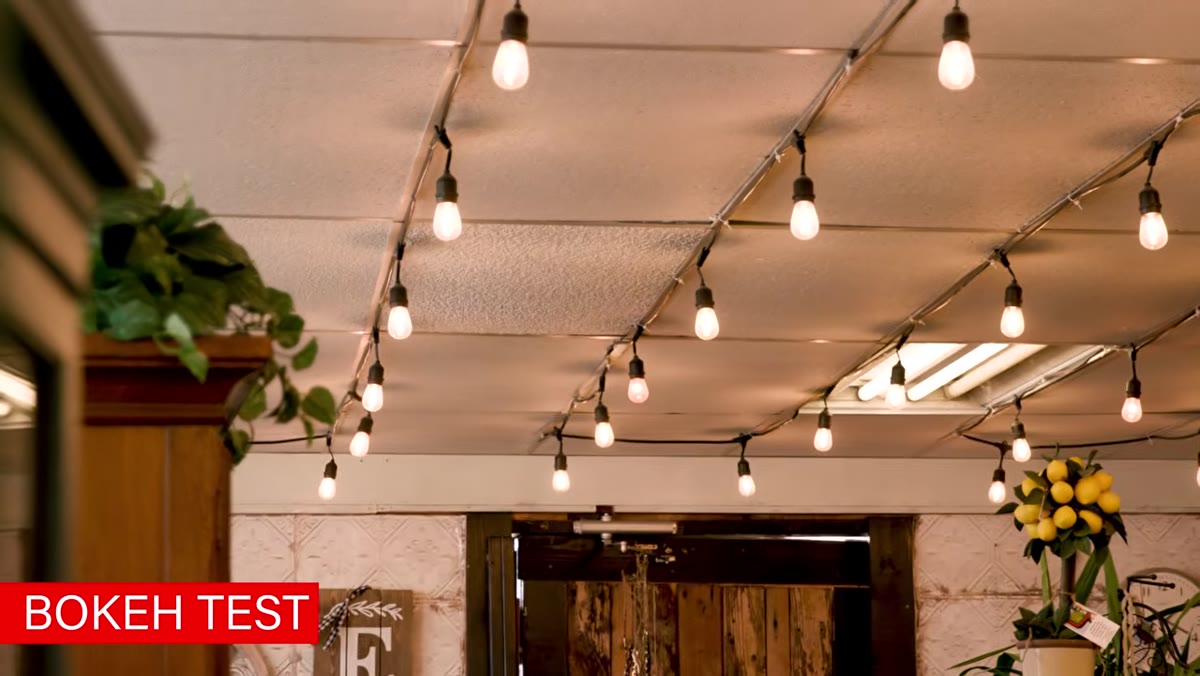
Two-thirds of a stop separates f/1.2 from f/1.8 on paper, but the difference in background blur is more visible than that math might suggest. Shot in a location with point-light sources in the background, the f/1.2 produces bokeh circles that bloom larger, fall further out of focus, and blend together more smoothly. The f/1.8 produces recognizable bokeh too, but the circles are smaller and the transition between in-focus and out-of-focus areas is less gradual. For portraits where that creamy, dreamy separation is part of your signature look, the f/1.2 delivers it more effortlessly. For documentary work, events, or anything where bokeh is a bonus rather than the point, the f/1.8 holds its own without embarrassing you.
Bokeh comparison with background lights, f/1.2 vs f/1.8
Two-thirds of a stop separates f/1.2 from f/1.8 on paper, but the difference in background blur is more visible than that math might suggest. Shot in a location with point-light sources in the background, the f/1.2 produces bokeh circles that bloom larger, fall further out of focus, and blend together more smoothly. The f/1.8 produces recognizable bokeh too, but the circles are smaller and the transition between in-focus and out-of-focus areas is less gradual. For portraits where that creamy, dreamy separation is part of your signature look, the f/1.2 delivers it more effortlessly. For documentary work, events, or anything where bokeh is a bonus rather than the point, the f/1.8 holds its own without embarrassing you.
What This Comparison Misses (and Why It Still Matters)
I’ve done enough of these tests myself to know that lab-style comparisons always leave something on the table. JP’s methodology is solid, but a few things are worth adding from a budget-shooter perspective.
First, autofocus speed and real-world reliability under pressure matter more than sharpness charts for a lot of working photographers. Neither lens was stress-tested here in low light or with a moving subject, and that’s where premium glass often earns its money back faster than any resolution test shows.
Second, the color rendering difference between these two lenses is actually a bigger deal than it sounds in a quick comparison. If you’re shooting a full event or a long portrait session with one lens, your color grading is consistent. The moment you start mixing lenses with different color signatures on the same shoot, you’re adding matching work in post. Not a dealbreaker, just something to budget time for.
Third, and this is the thing I keep coming back to: the f/1.8 is $200. For someone starting out, that’s a lens you can buy, use hard, learn from, and sell for close to what you paid. The f/1.2 is an investment you hold onto because you built a business around needing it. Those are two different purchasing decisions even before you look at a single test chart.
The single most important takeaway from this comparison is one most gear reviews bury: the f/1.8 is genuinely good. Not “good for the price” in the condescending way people mean when they say that. Actually good. If you’re not shooting wide open in situations where the difference between f/1.2 and f/1.8 bokeh is visible and meaningful to a client, you can put that $2,000 price difference to work somewhere else in your kit and come out ahead.
Watch the full tutorial on YouTube to see JP’s side-by-side frames for yourself. The close-focus section alone is worth the runtime.
Comments (2)
Love how you break down complex stuff into manageable steps.
Applied this to my portfolio shots and the improvement is noticeable.
Leave a Comment